!! Important !!
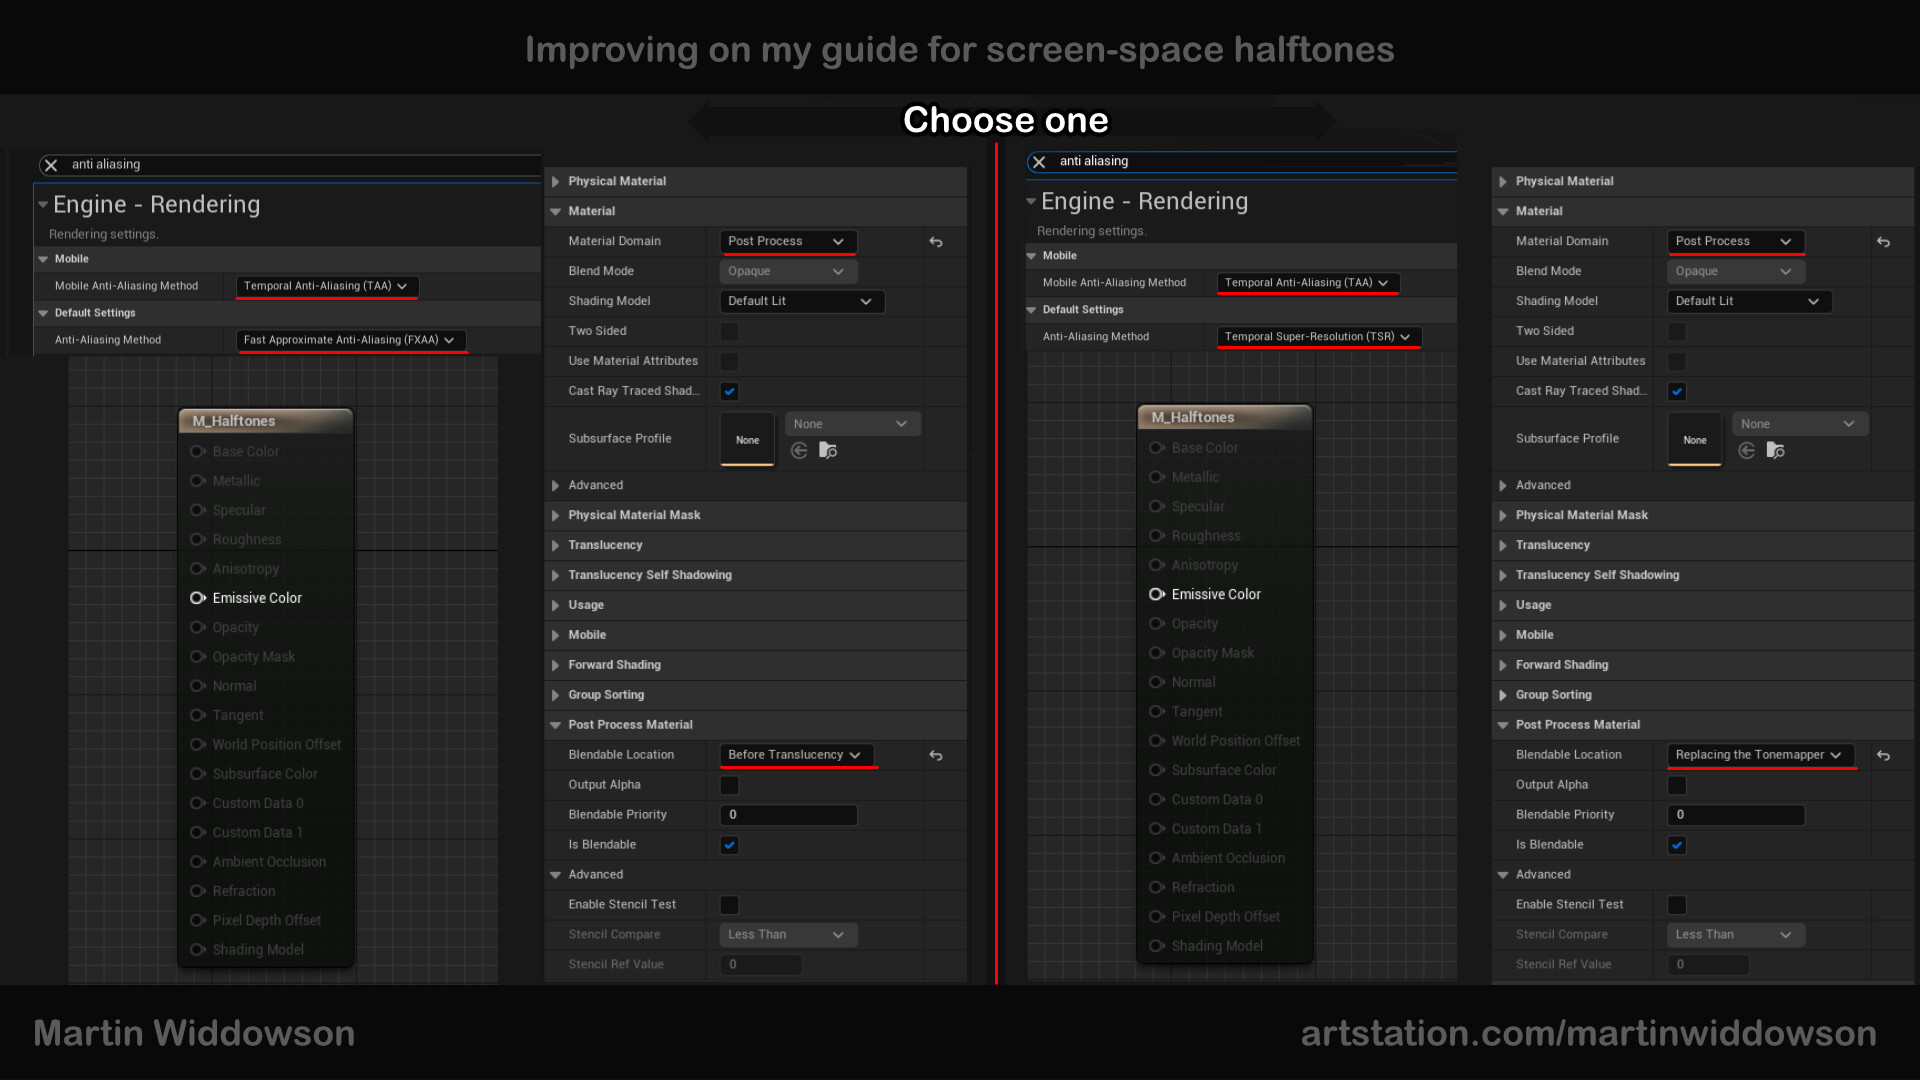
This tutorial has been revised in a new post here. If you are after Toon or Cell shading continue reading here.
Contents
- Post processing materials for UE4
- Introduction to Cel shading
- Cel Shading in UE4
- Introduction to Toon shading
- Toon Shading in UE4
- Introduction to Halftones
- Halftones in UE4
- Dependencies for Halftones
- Known issues
- Links and resources used
Post Processing Material Setup for UE4
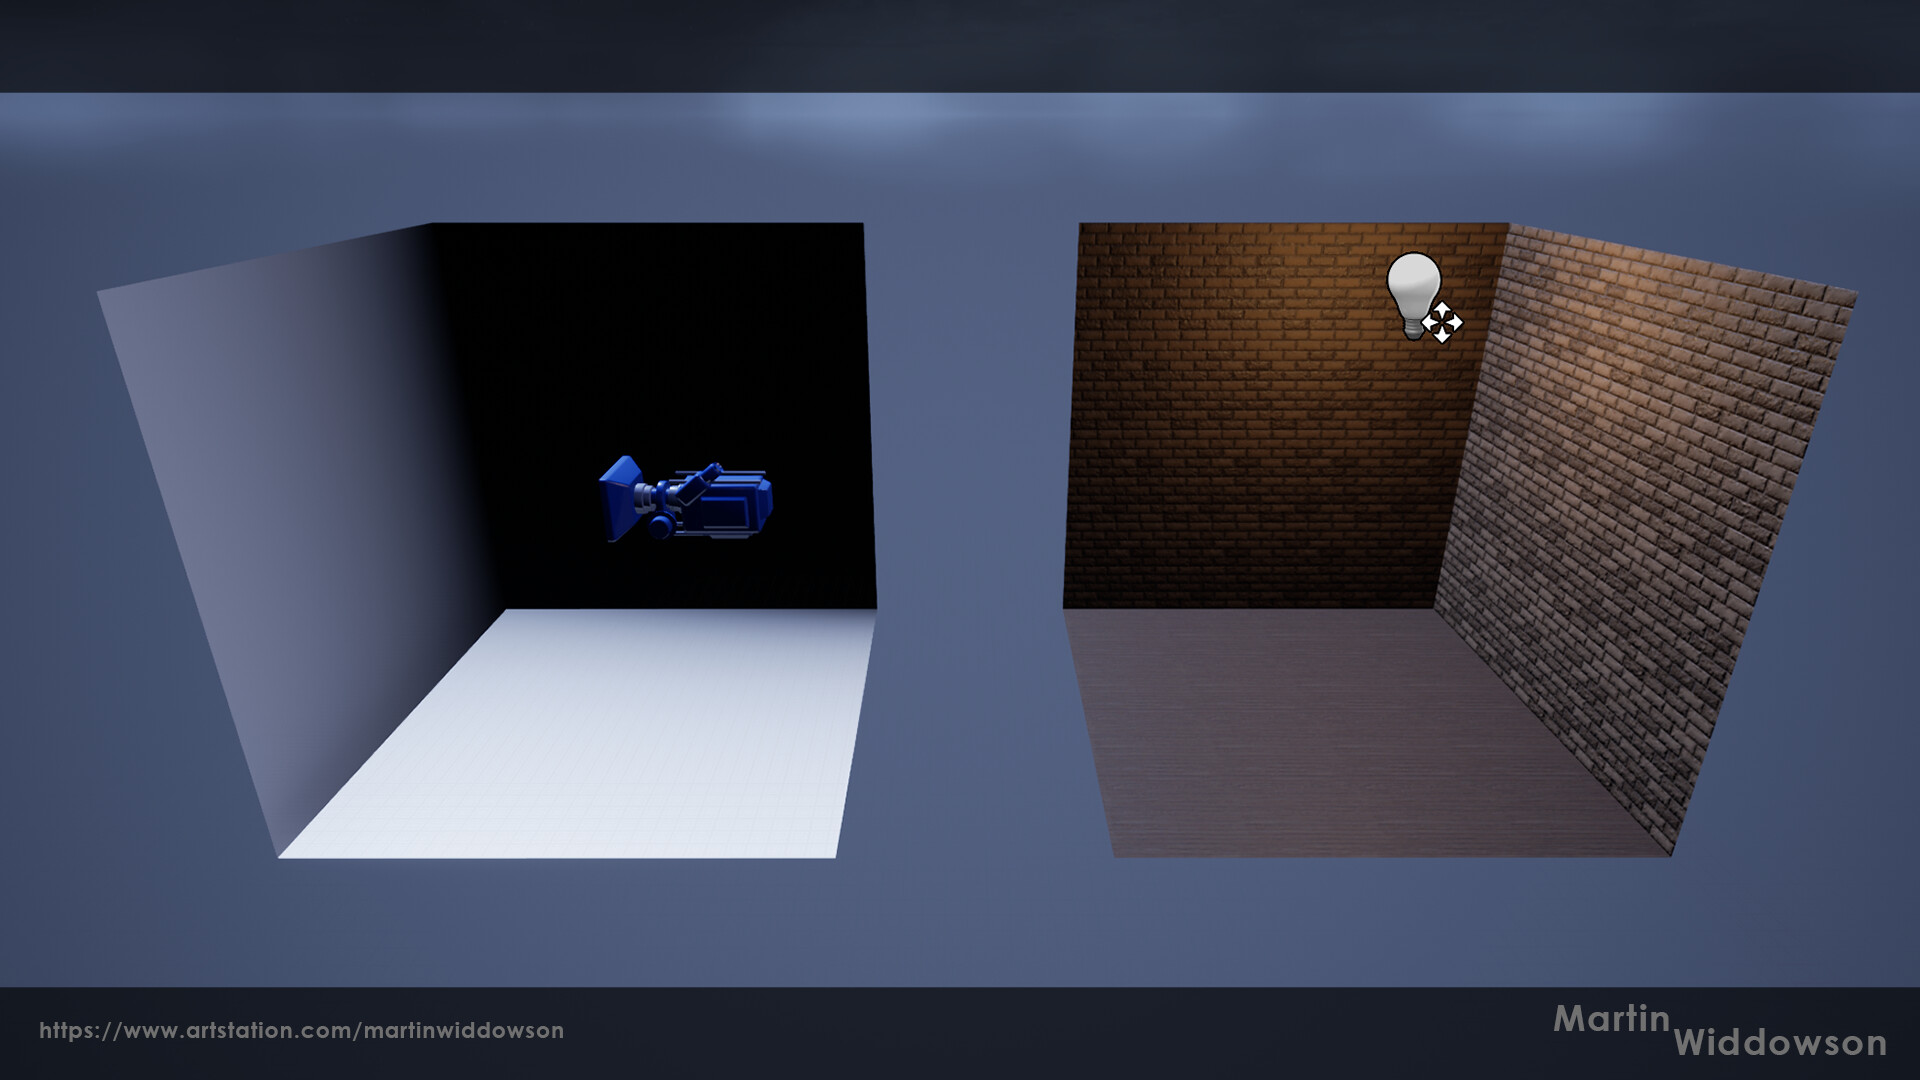
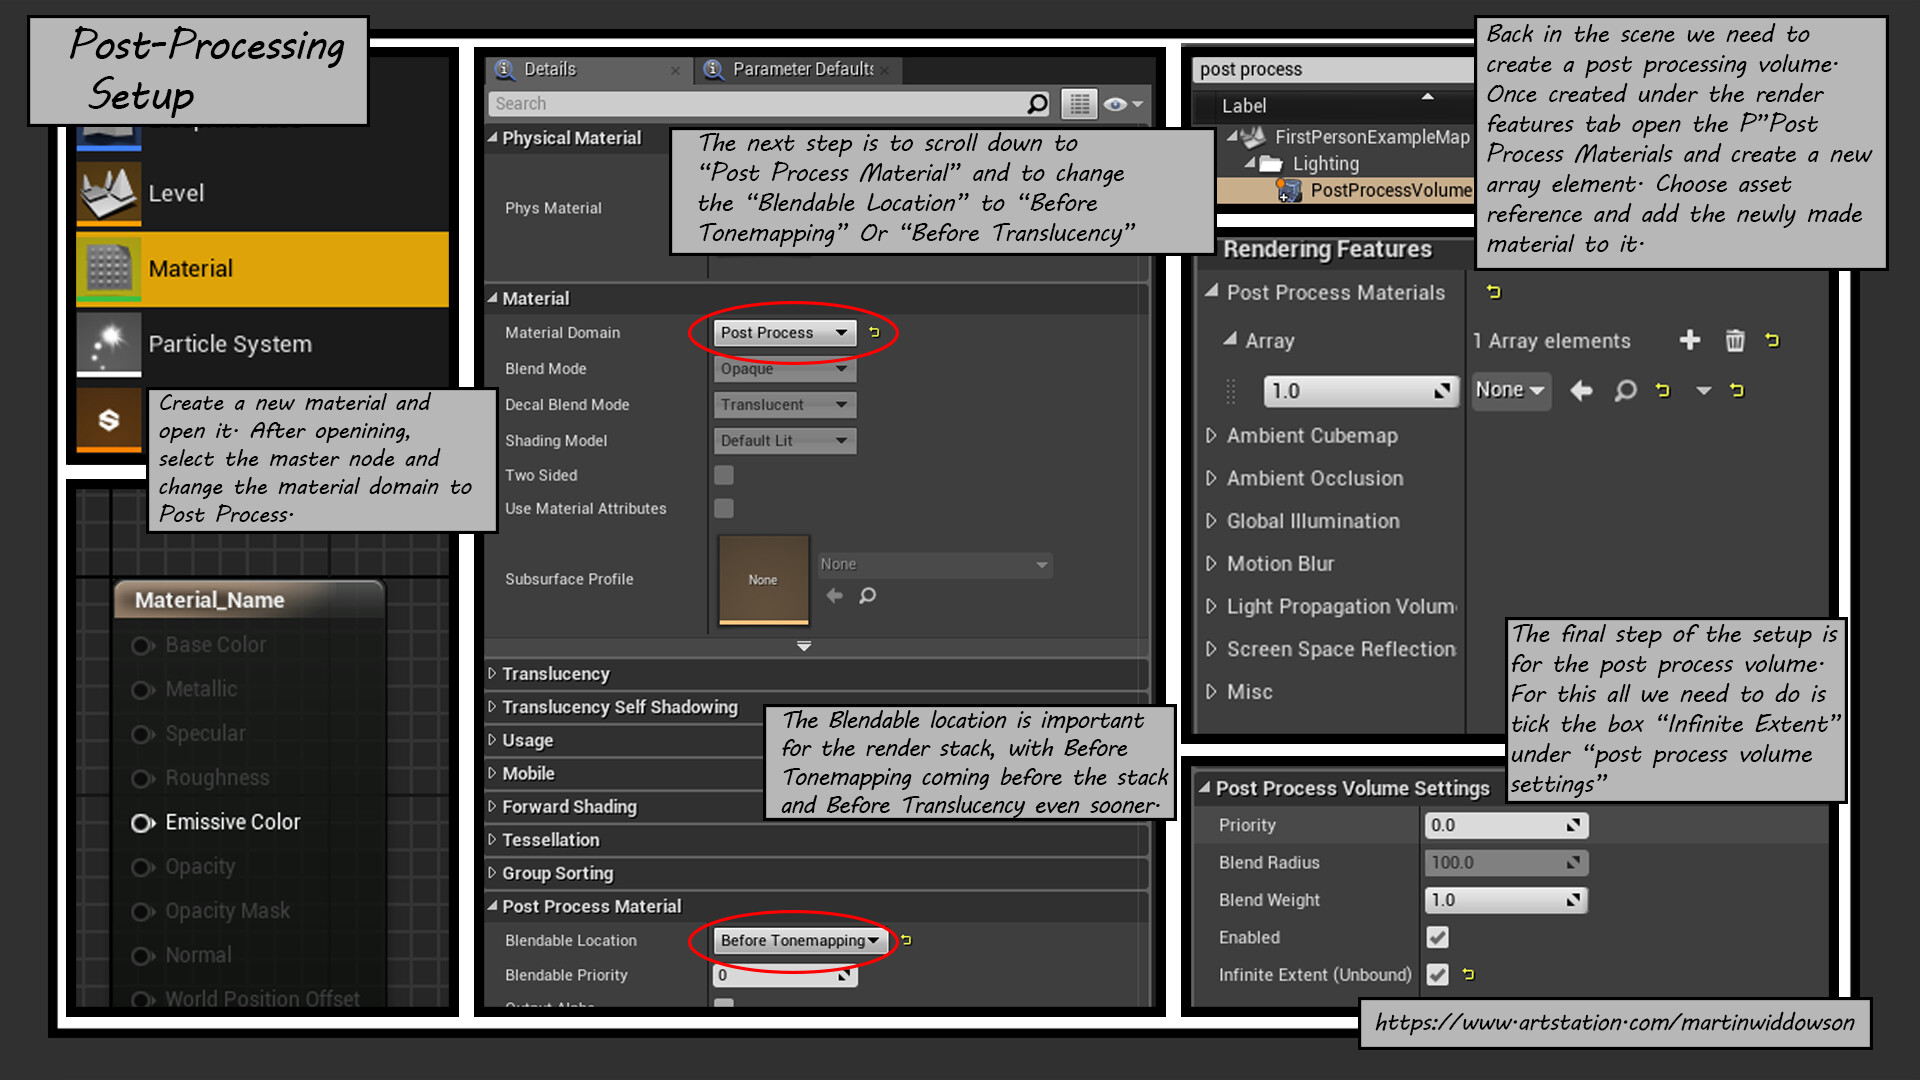
In Unreal Engine we have access to post processing, it allows us to adjust the look of our game through certain elements like bloom, vignette and more. We will be using the post processing volume to recalculate shading. To create a new post processing volume, under the modes window find the visual effects tab and drag in the post processing volume into your scene. The settings I have used for the volume are as follows:
Exposure min AND max brightness: 1.0
Infinite Extent (unbound): True (ticked), this setting is not necessary for the shader to work as the post process volume only influences cameras within it. With this setting ticked it acts as if you scaled the volume up.
Introduction to Cel Shading
So what is Cel Shading? Its a type of rendering used to imitate the looks of comic books or cartoons. Unlike conventional lighting with smooth gradients, Cel shading has hard edges and a step gradient for displaying light. To make Cel shading you can use two methods: Look up tables (Luts) or you can use maths to iterate the steps in gradient. For this tutorial i will cover only how the second method works.
Cel Shading for UE4
Cel shading for Unreal Engine is quite simple. The method I have chose involves using a value instead of a look up table for a little more modularity. This works by taking the scene colour including lighting (post process input 0) and desaturates the scene. We then multiply the output by the amount of Cels we want in our lighting, reduce it to a whole number, and then divide back to the 0-1 range. Finally we can take this output and add it back to out base colour to reintroduce lighting for our scene. I have included a 3 vector which has a default of white, with a purpose of colour correction if the scene happens to need it at any point. The last step to the graph is to bring back ambient occlusion by multiplying it by our previous results.
Introduction to Toon Shading
Toon shading is very similar to Cel shading with the only difference being added outlines that help to define the shapes of your objects. For our Toon shader we will use what we made in Cel Shading, then add detection for both outlines and normals.
Toon Shading for UE4
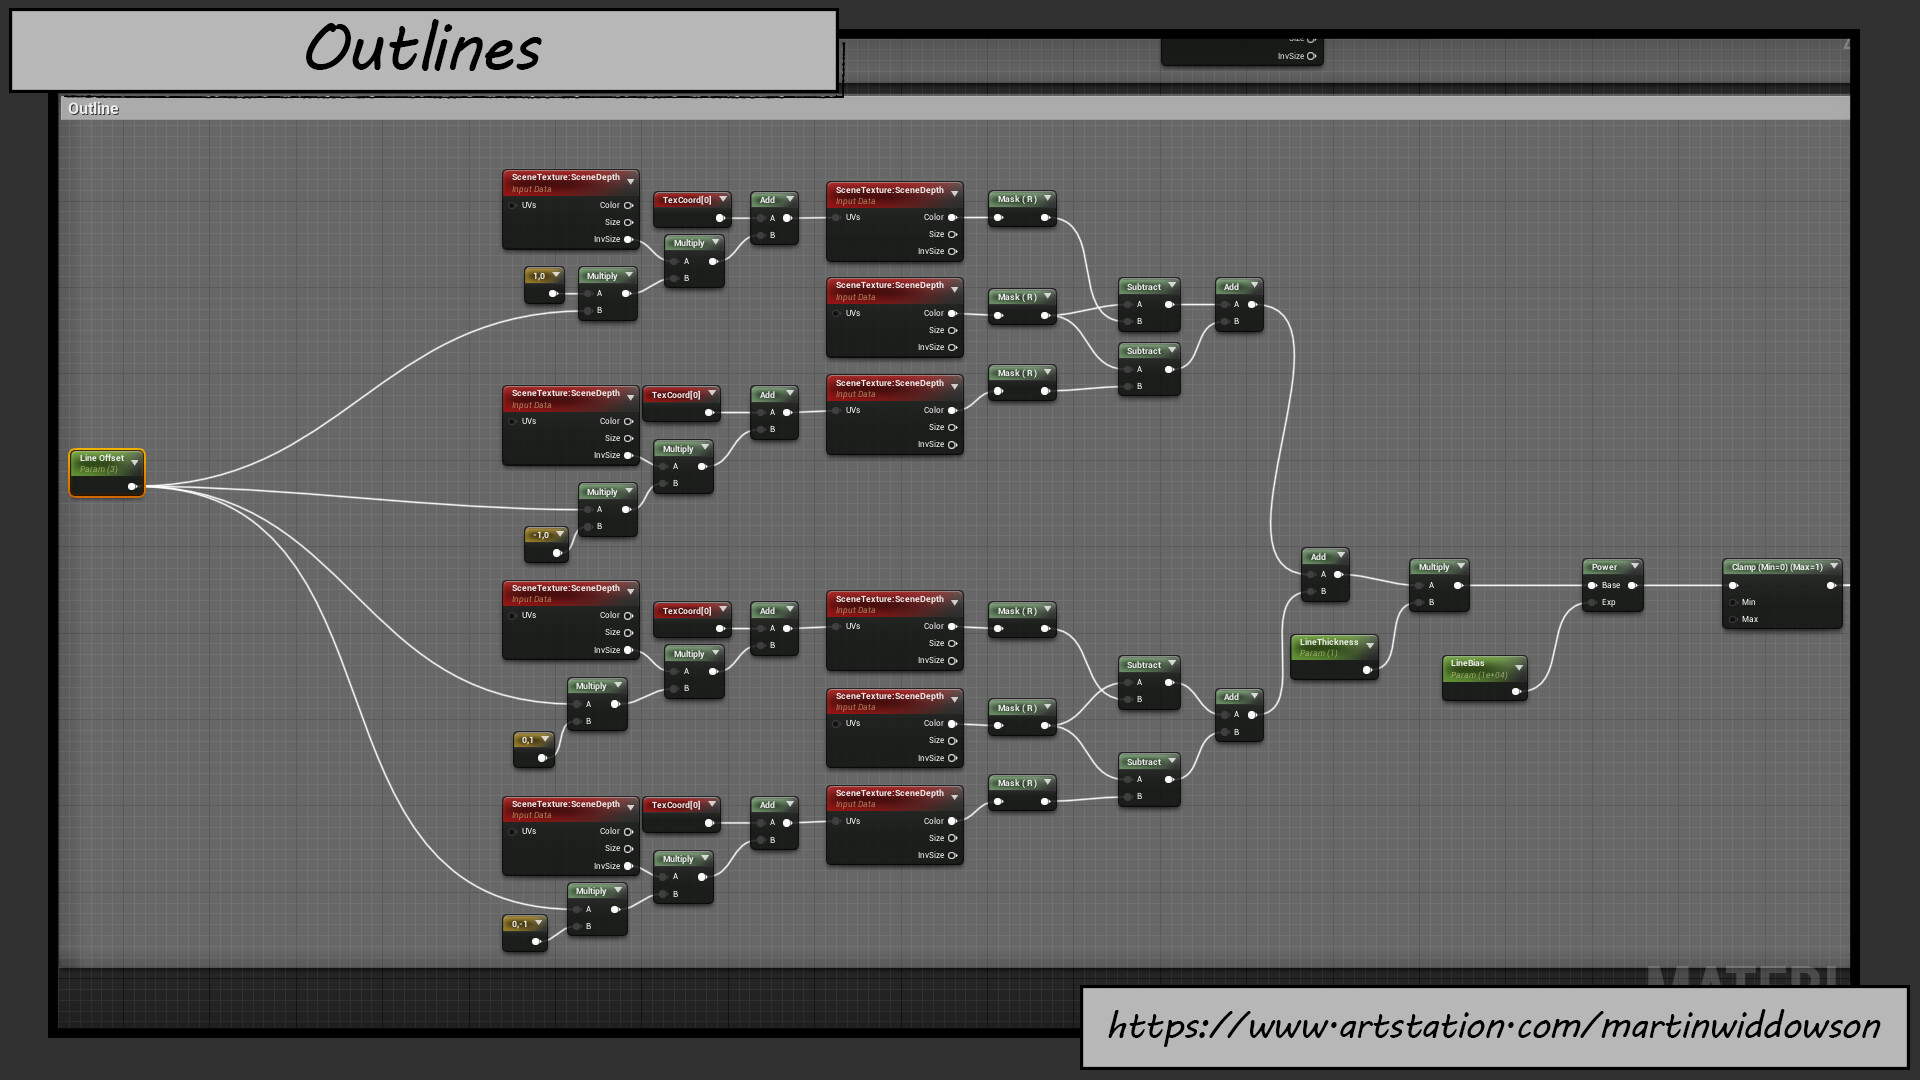
In Unreal Engine the process of calculating the outlines is to find the scene depth of the object and compare it to the background depth, at this particular point it will find the edge of the objects but nothing will be drawn on the screen. We can further determine the thickness of what we want drawn and finally our bias of what is drawn through this method:
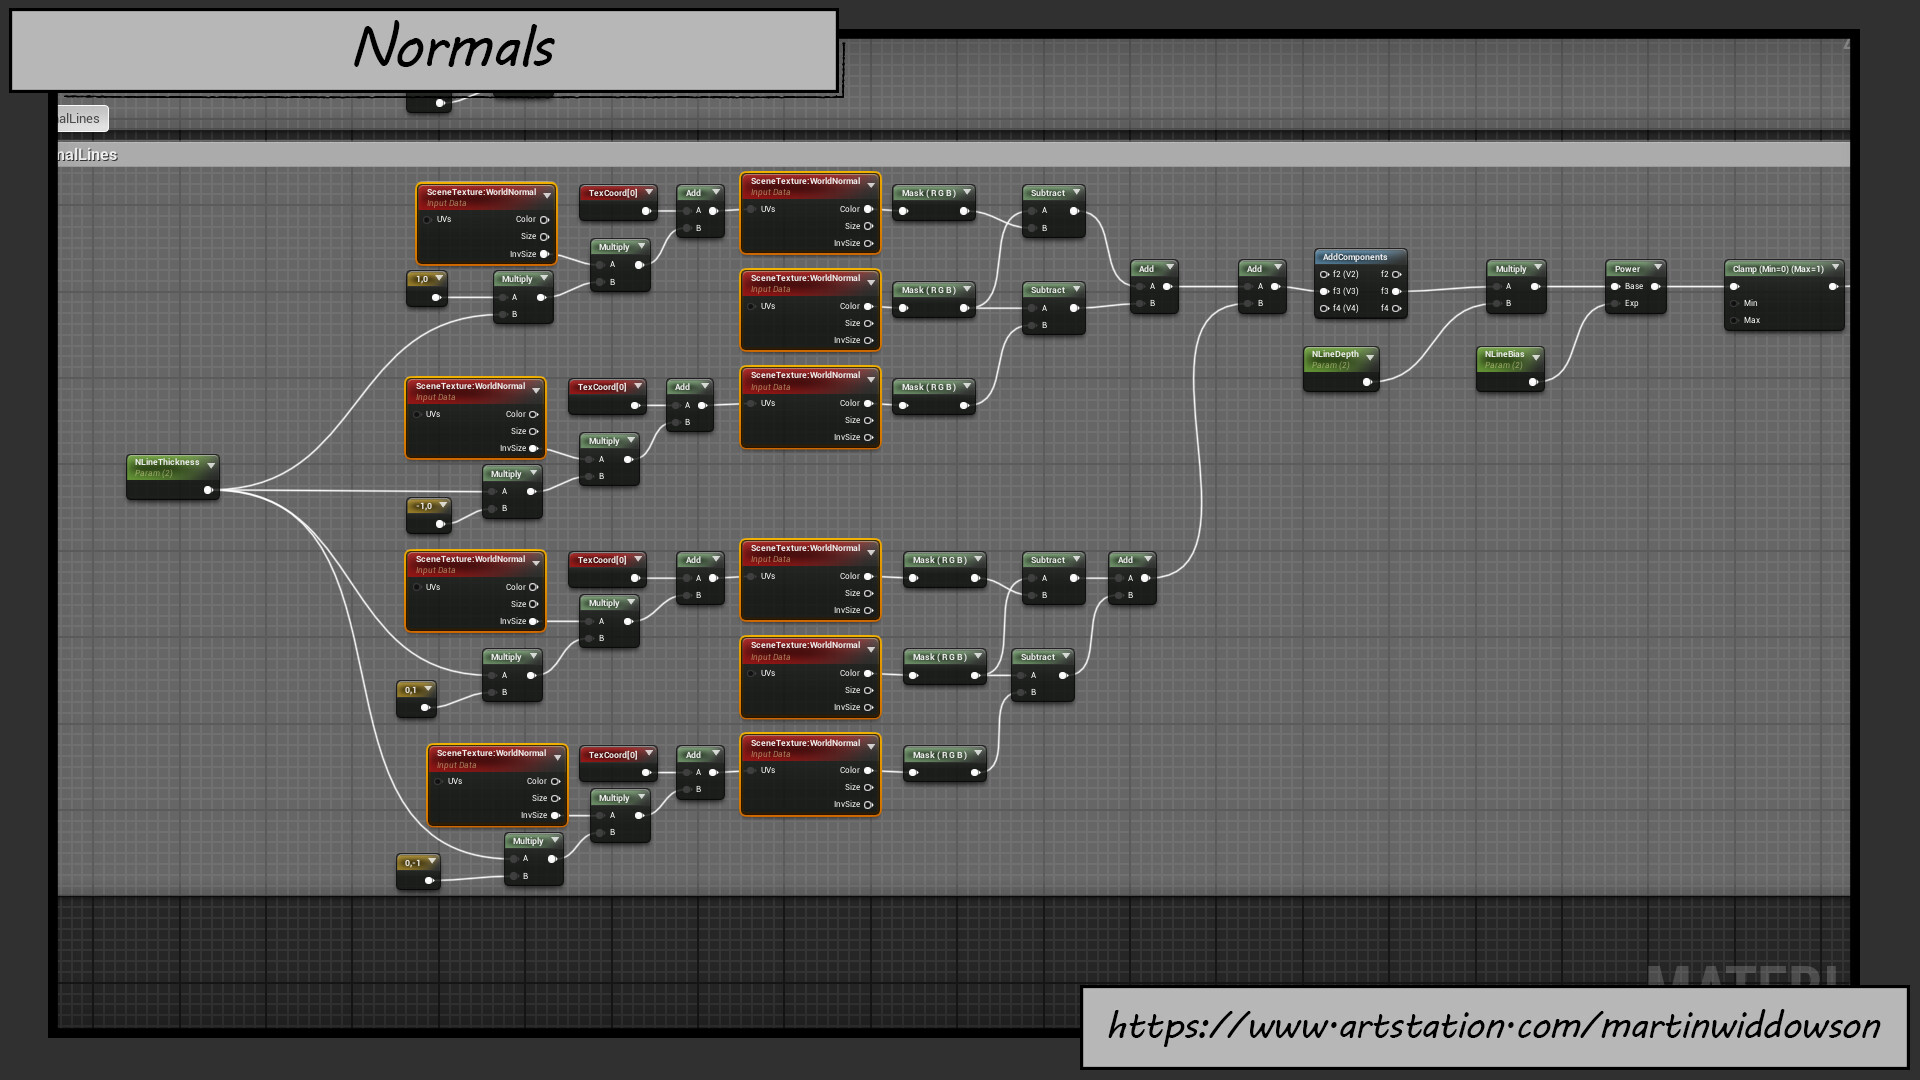
The node network to create outlines is great for lines on the outer sides of objects, however it fails to draw any lines inside the object. To compensate for this we can duplicate our network for the outlines and convert all the scene textures from scene depth to world normal. For normals it is important to add an "addComponents" node and connect the output of the outlines into the float 3 input, then output from the float 3. From here we can take the maximum value of both graphs and use this as an alpha for a linear interpolation (lerp). For our lerp our alpha is our outlines, our B is the line colour and A will use what we made from Cel Shading.
Of course the outlines are now rendering all objects in scene, including our sky box. This is undesirable as the entire sky box becomes a grid of lines. To fix this we can make a culling mask to stop the lines from rendering beyond a certain threshold.
Introduction to Halftones
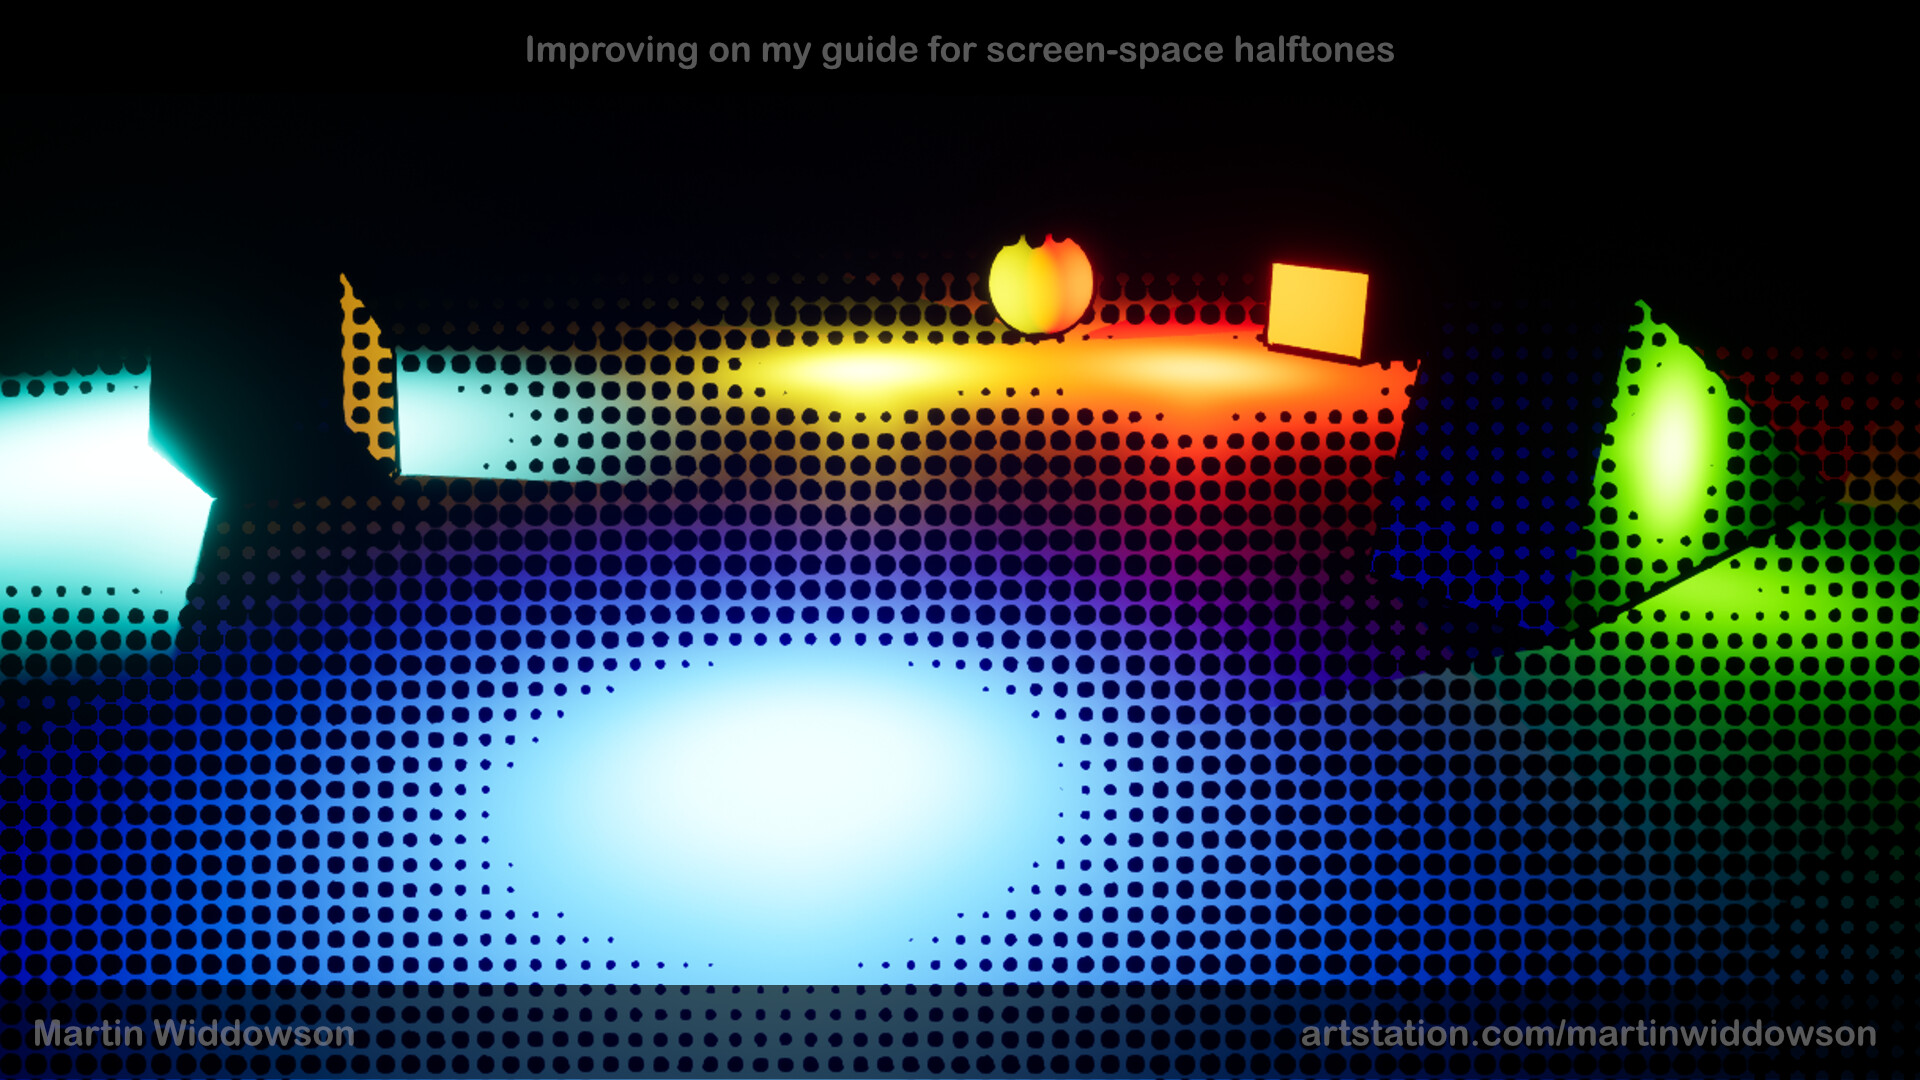
What are Halftones? Halftones are a method of printing that creates a gradient by the use of dots with various size or spacing. From a certain distance the dots that make up images become blurred with each other and create a pleasing image to look at, while being efficient at saving ink.
We can replicate this in Unreal Engine with a few methods, the first is a per-texture instance, this is not a dynamic solution and shading will be static across the objects. The second method uses post processing to overlay a pattern across the screen. This allows the camera to move and the dots to follow, but can be effected by the objects, their materials and the lighting on them, making for a fully dynamic solution.
This is a small scene made by Dris Hunt ( https://twitter.com/DrisHunt ) using assets from the Unreal store: Soul: Cave, Medieval Dungeon, Paragon: Revenant and Infinity blade. To find out more there are links at the end. Special thanks to Dris for helping find bugs, bug fix and create this shader.
Halftones for UE4
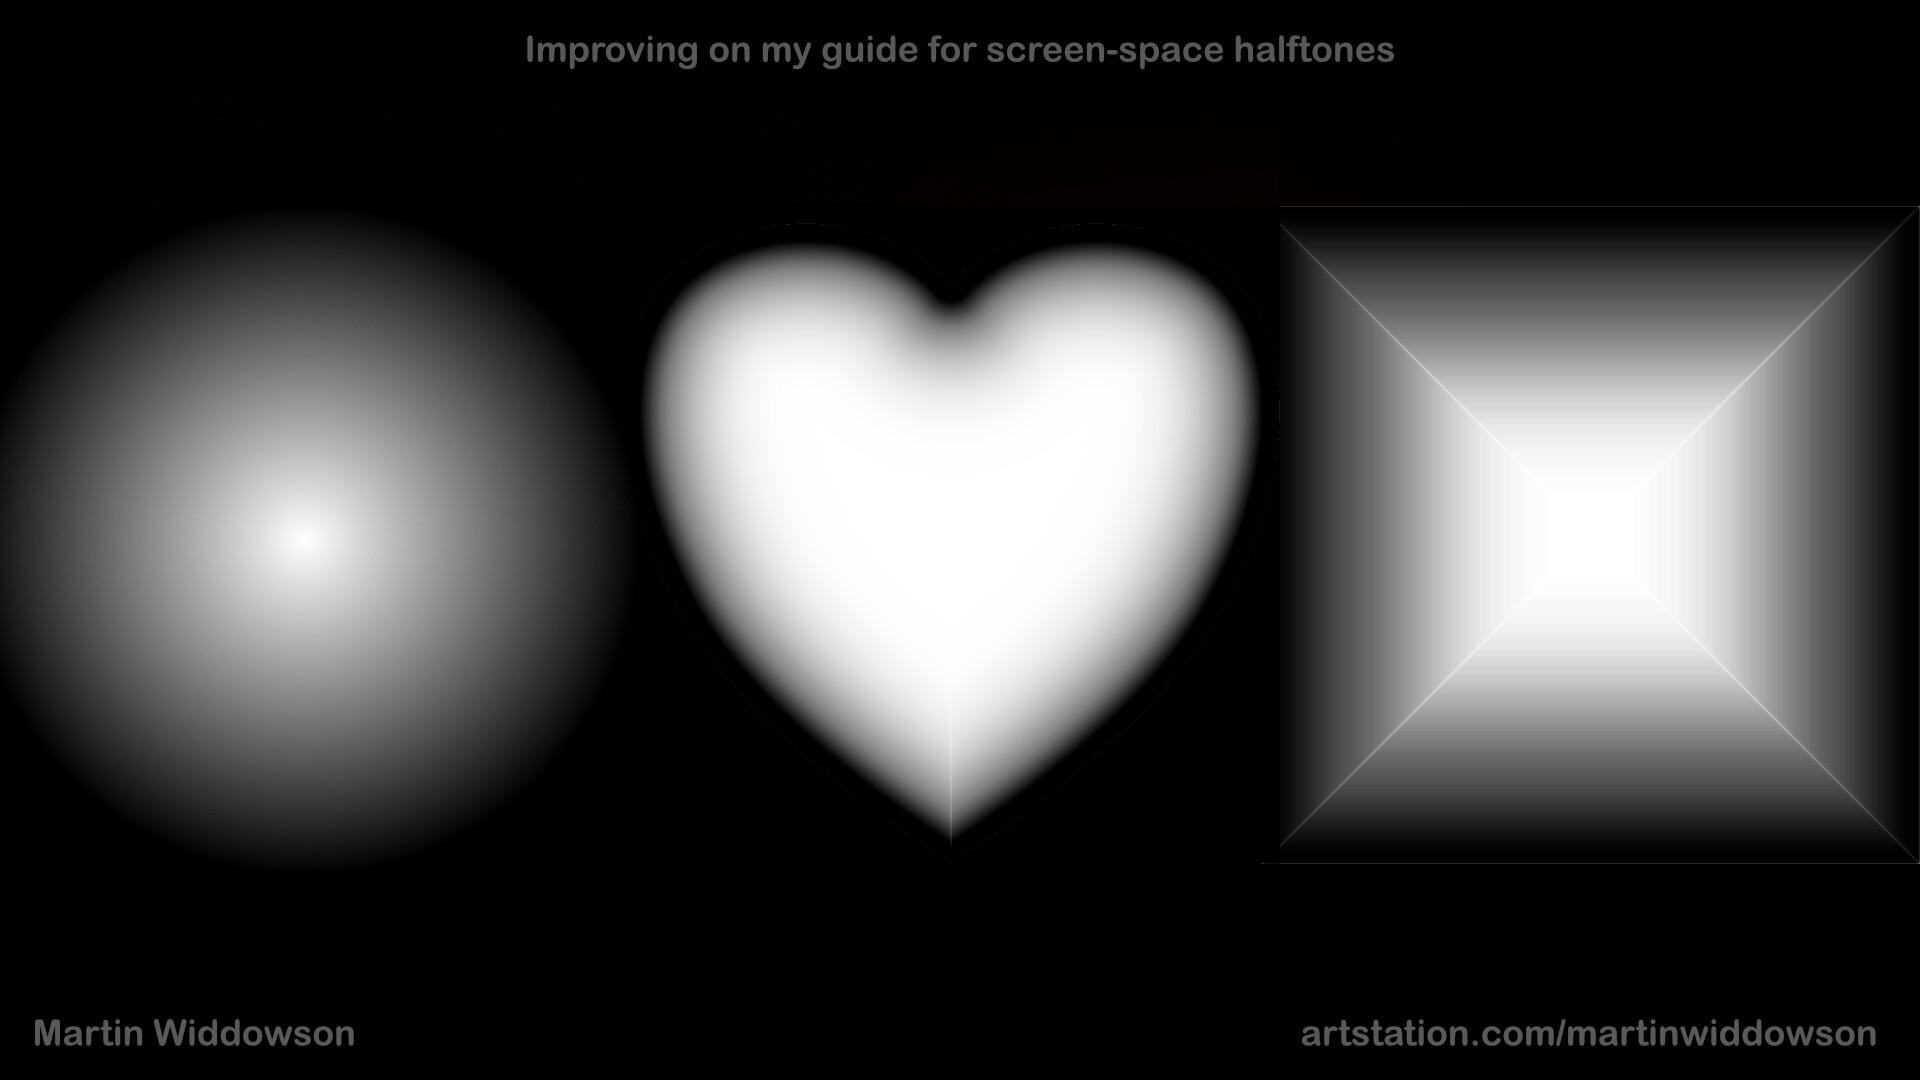
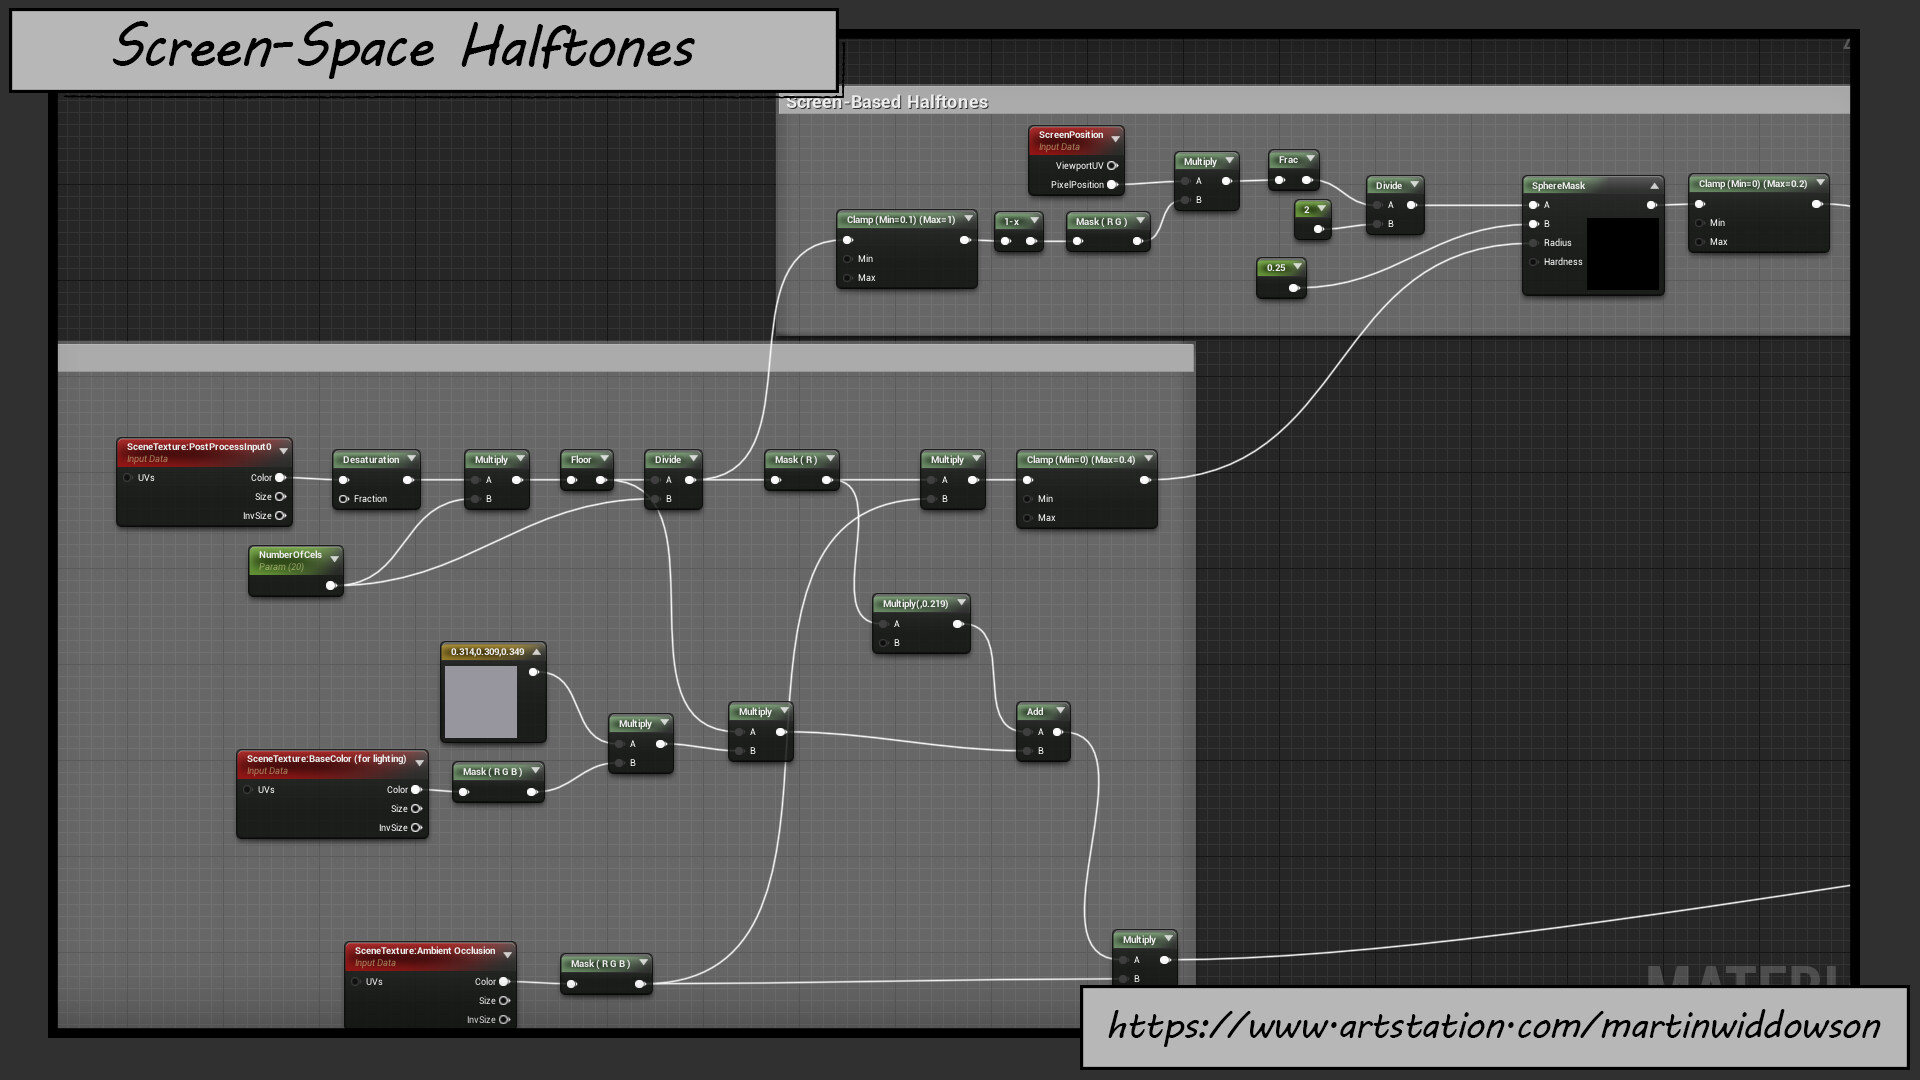
Using the components from both Toon shading and Cel shading we can develop a halftone shader. To achieve this I have used the values of light as steps in radius size for a spherical mask component. The input A is the position on screen for where the dots are placed and finally input B is the centre of where that dot is. The last input hardness does not need to be changed and can be left at 100, this simply changes the falloff or gradient for the dots. A small adjustment i made to Cel shading means that the shadows will be fully black, this was done by taking the Floor node and multiplying it to the base colour, then adding back in the cel shading afterwards.
From here we can use the output of the sphere mask as an alpha and reintroduce it into our graph. If we want the dot colour to be changed we can use a Lerp with input A as our output of cel shading. Input B will be a colour parameter which allows us to change the colour to whatever we like. As an optional step we can introduce the scene light and multiply it by our new dot colour parameter to bring in some light colours in the scene. This optional step can be a little problematic in some versions of unreal engine where the scene being divided outputs undesirable results.
The final step is to connect out last Lerp node into our outline lerp. Depending on where you would like halftones to influence you can connect either the line colour Lerp, the dot Lerp or the output of the Cel Shader into the A>B, A==B and A<B Statements of the render mask.
Dependencies for Halftones
There are a few dependencies for this shader, the first being materials. They are allowed to be as complicated as you like with only one exception, for the halftones to work correctly the RGB Channels must contain a minimum of 0.05 if you are to have any particular colour. For example if i wanted Red i would do R: 1, G: 0.05 and B: 0.05. However doing blacks and anything grey can be done regularly. The cause of this is due to taking out the scene colour through the cel shader, then multiplying the red and green channels of the screen UVs by the scene colour, thereby influencing the halftones.
Can i do metal and roughness? Metallic and Roughness are interesting, yes you may do both but be weary with metal as it reacts incorrectly.
Another interesting effect to play with is emissive. It reacts to the halftones on the emissive object, but not the areas surrounding it, furthermore the emissive colour is based on the diffuse of the surface rather than the emissive colour.
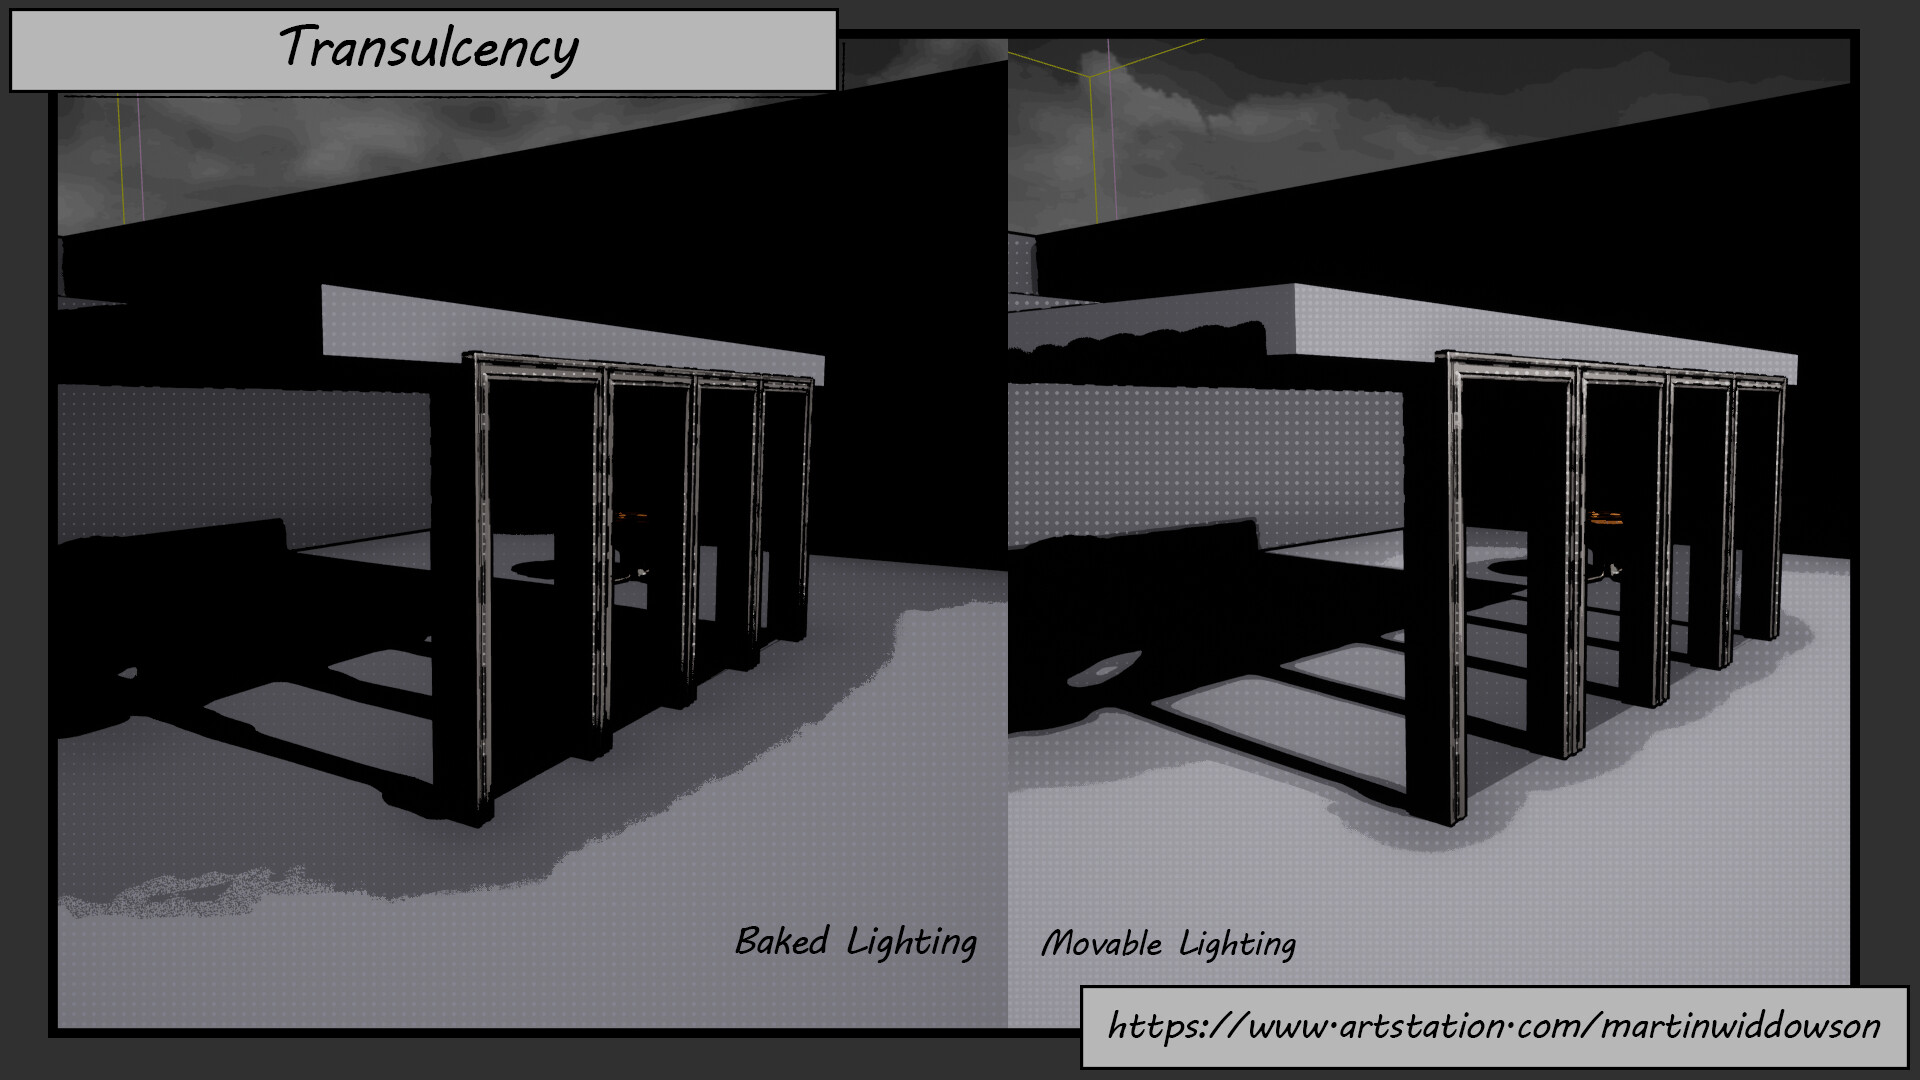
The final dependency for the shader is translucency. Any material like glass can be rendered, but is dependent on static or movable lights. With baked lighting the shading behind glass becomes completely black when in shadow. Otherwise in the same scenario with movable lighting the shading is as expected.
Known issues
There have been a few issues noticed with the shader. The first one is how shader complexity increases due to transulcency. This reduces the amount of glass able to be used within the scene.
The second issue is due to how light is extracted for the dot colours, this can cause shaded areas to appear the wrong colour and does similarly to some materials and colours.
The third issue is how the halftones are calculated from the cel shading. The cel shading comes in RGB and the red and green channels influence both spacing and size of the dots, not fully desirable but it can be worked around.
The final known issue is with alphas and complexity. As always when overlapping many alphas the shader has more to compute, increasing the overall performance impact.
Links and resources used
http://blog.theoroy.com/2017/04/27/anime-look-cel-shading-in-ue4/
https://www.raywenderlich.com/146-unreal-engine-4-cel-shading-tutorial
https://www.raywenderlich.com/92-unreal-engine-4-toon-outlines-tutorial
https://www.youtube.com/watch?v=0UBNXneL1oo Underscore's youtube Channel
https://www.youtube.com/watch?v=cQw1CL0xYBE Offical Unreal Engine Youtube
https://forums.unrealengine.com/development-discussion/rendering/42507-lighting-in-post-process-material
Unreal Assets:
https://www.unrealengine.com/marketplace/en-US/product/soul-cave
https://www.unrealengine.com/marketplace/en-US/product/a5b6a73fea5340bda9b8ac33d877c9e2
https://www.unrealengine.com/marketplace/en-US/product/paragon-revenant
https://www.unrealengine.com/en-US/blog/free-infinity-blade-collection-marketplace-release